Your Comprehensive Guide to Microscopy for the USABO (and some cool research stuff)
Idea creds @leucine!
Microscopes help you see small things. Here’s a list of different types that we’ll go over in this article (I chose these because I’ve seen them tested on USABO before or in USABO prep materials, or are super good to know for lab research if you’re interested in that.)
Light microscopy (LM):
Bright-field (BF)
Dark-field (DF)
Fluorescence
Confocal
Fluorescence Resonance Energy Transfer (FRET) microscopy
Electron microscopy (EM):
Scanning electron microscopy (SEM)
Transmission electron microscopy (TEM)
Let’s go over each kind.
Light microscopy (LM)
LMs consist of simple and compound microscopes. One difference is that compound microscopes have both coarse and fine knobs, while simple microscopes don’t have such intricate “knobbery.” Additionally, compound scopes have multiple lenses to increase magnification (the stacked lens’ magnifications multiply; stacking a 10x lens on a 40x lens will produce 400x mag) while simple scopes typically only have one lens. A magnifying glass qualifies as an example of a simple microscope. You’ve likely used a compound microscope in a biology class. Here’s what each kind looks like:
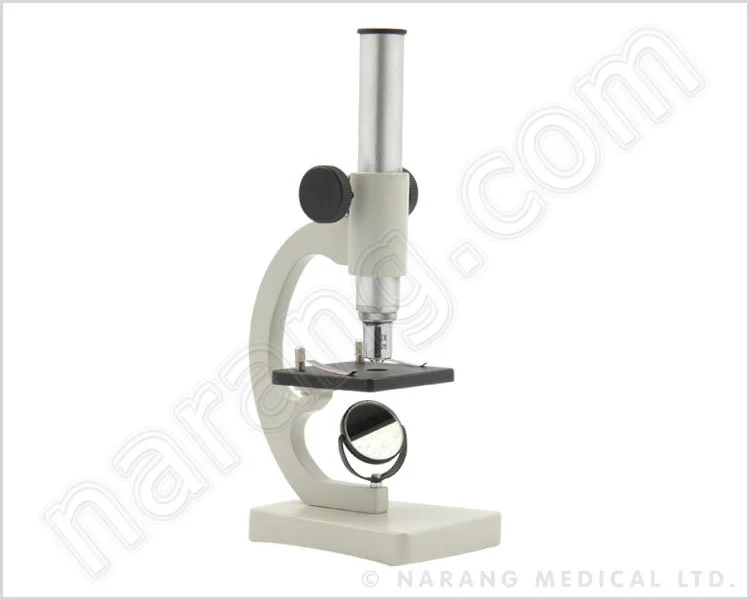

The eyepiece lens has a single, unchangeable magnification, usually 10x. The objective lenses can be rotated to focus on the sample; typically, these values are 4x, 10x, and 40x. Sometimes there’ll be a 100x on there too, which, when multiplied with the eyepiece lens, produces a 1000x magnification. This 100x lens is usually used with oil in oil immersion microscopy to reduce light refraction at such a high magnification (at this level, even air is a disturbance to the scope).
The rest of the microscope parts aren’t super interesting; they just help clip the specimen to the scope, light it up, etc.
Bright-field (BF)
White light illuminates the translucent specimen from below, producing something that looks like this:

This technique is used with stained/colored samples.
Dark-field (DF)
This is kind of the opposite of BF: rather than the light that passes through the translucent specimen, the lenses pick up the light that is scattered or reflected by the specimen. This technique is used for samples that have no color/staining or are otherwise difficult to see. Here’s what the result looks like:

Fluorescence
Fluorescence microscopy uses fluorescent markers to light up specific parts of samples. It’s special because it utilizes fluorescent properties of the markers (which can be special glowy antibodies, proteins like GFP, etc), which means that the markers absorb a certain wavelength of light to bring their electrons to a higher energy level, and fall back down, emitting a certain, lower, wavelength of light. These absorption and emission wavelengths are specific to each marker, and are specified in the markers’ absorption and emission spectra.
Confocal
Confocal microscopy is pretty complex, but it’s essentially fluorescence microscopy, except with lasers that help you excite fluorescent markers in the sample layer-by-layer; this way, you can make a 3D image by putting all the layers together. It looks super cool, 10/10 experience, highly recommend trying this out in a lab:

Fluorescence Resonance Energy Transfer (FRET) microscopy
So this is basically doing FRET and viewing your results using confocal or some other fluorescence-friendly microscopy method. Learn how FRET works here: https://www.sixfootscience.com/brain-snips/dont-fret-fluorescence-resonance-energy-transfer-in-a-nutshell.
Electron microscopy (EM)
Up to this point, all the techniques discussed can be done with live tissue/cells. But for EM, we need to shoot electrons through the specimen, so we need special sample prep which involves killing cells.
Scanning electron microscopy (SEM)
SEM consists of shooting electrons at the surface of the sample and measuring how they bounce off and stuff. This way, we can see the surface of super small things:

Transmission electron microscopy (TEM)
TEM consists of shooting electrons through the sample (a thin section of something) and measuring how much they bounce back to determine what’s inside the super small thing.

Electron tomography involves putting a bunch of TEMs together (remember, these are sections which can be interpreted as layers) to create a 3D structure.

So, yeah. Here’s some resources to learn more:
More on simple and compound scopes: https://byjus.com/biology/functions-of-microscope/
Good article about types of objective lenses, and other kinds of microscopy: https://accu-scope.com/news/what-are-the-different-magnifications-of-objective-lenses/
H+E staining, which is relevant to microscopy (LM) - https://www.sixfootscience.com/brain-snips/when-hes-the-gold-standard-of-tissue-staining
Laser capture microdissection, SUPER cool - https://www.sixfootscience.com/research/laser-capture-microdissection-lcm-procedure-amp-medical-applications
FRET article again - https://www.sixfootscience.com/brain-snips/dont-fret-fluorescence-resonance-energy-transfer-in-a-nutshell